|
|
1 year ago | |
|---|---|---|
| public | 1 year ago | |
| src | 1 year ago | |
| src-cordova | 1 year ago | |
| .editorconfig | 1 year ago | |
| .env.production | 1 year ago | |
| .eslintignore | 1 year ago | |
| .eslintrc.js | 1 year ago | |
| .gitignore | 1 year ago | |
| .npmrc | 1 year ago | |
| .prettierrc | 1 year ago | |
| README.md | 1 year ago | |
| index.html | 1 year ago | |
| package-lock.json | 1 year ago | |
| package.json | 1 year ago | |
| postcss.config.js | 1 year ago | |
| quasar.config.js | 1 year ago | |
| tsconfig.json | 1 year ago | |
| yarn.lock | 1 year ago | |
README.md
智能大屏系统
使用 Vue3 + Typescript + Quasar + Pinia开发
##基础命令 安装依赖 Install the dependencies
yarn/npm install
开发环境启动项目 Start the app in development mode (hot-code reloading, error reporting, etc.)
quasar dev
打包项目(dist文件夹) Build the app for production
quasar build
短期启动打包项目(dist文件夹目录下)
quasar serve -p xxxx(端口号,非必要项)
更多 Customize the configuration See Configuring quasar.config.js.
开发约束
主要目录说明
 ─── public 存放图片等静态资源
  ├─ src
  │  ├─ boot
  │  │   └─ axios.ts (Ajax请求封装文件,请求拦截,响应拦截)
  │  │
  │  ├─ api
  │  │   ├─ class.ts (全局对象类型定义(paginaion、convrot))
  │  │   ├─ common.ts ()
  │  │   └─ xxx (一级模块)
  │  │       └─ xxxXxx (二级模块)
  │  │            ├─ xxxApi.ts (模块接口)
  │  │            └─ model(模块TS类型定义)
  │  │
  │  ├─ pages
  │  │   └─ xxx (一级模块)
  │  │       ├─ xxxTab.vue (tab栏项)
  │  │       ├─ tableColumn.ts (table组件行列字段定义,动态列定义)
  │  │       └─ xxxXxx (二级模块)
  │  │            ├─ components (页面拆分组件)
  │  │            └─ index.vue (主模块页面)
  │  │
  │  ├─ components (公共组件定义)
  │  │
  │  ├─ layout ()
  │  │    ├─ initalayout.vue (平台检测页面控制)
  │  │    ├─ mainlayoutXxx.vue (各平台框架页面)
  │  │    └─ loginout.vue (登录页面)
  │  │
  │  ├─ router
  │  │    ├─ index.ts (路由初始化挂载,路由守卫(登录校验等))
  │  │    ├─ routes.ts (静态路由)
  │  │    └─ routerConteol.ts (动态路由获取,路由动态挂载方法)
  │  │
  │  ├─ css
  │  │   └─ quasar.variables.scss(全局CSS样式)
  │  ├─ shared (工具组件,经常复用的UI组件,比如textIcon)
  │  ├─ stores (pinia全局状态管理(字典、xx))
  │  └─ utils (工具类(动态下拉、xx))
  │
  ├─ .env.developmnet 个人开发环境配置文件
  ├─ .env.production  生产打包环境配置文件
  └─ .env.d.ts 全局类型
分页
1):分页请求使用axios封装的PostForPage()方法发送后端请求

2):API方法中标准传入类型为Pagianion<XxxSearchEntity>

3):页内分页具体代码可参考基础模块(dict、log、userRole等)

4):table组件中columns 与 visibleColumns 均定义在 tableColumns文件内,用以减少主要页面代码量
字典
字典使用pinia实现全局管理 使用时首先需要在对应页面初始化字典值
const useDict =useDictStore();

onMount(() => {
  useDict.getDictMap('dataState');
})
然后再需要转换字典的位置进行替换:
<q-td key="status" :props="props">
  {{ useDict.getDict('dataState', props.row.status)}}
</q-td>
动态下拉
动态下拉统一定义在Utils文件夹下filterUtils.ts文件内,由四个部分组成
function:
export const filterFunction:any = {
  xxxList : () => {}
}
options:
export const filterOption:any =ref({
  xxxList: [],
})
value:
export const filterValue:any = {
  xxxList: 'id',
}
label:
export const filterLabel:any = {
  xxxList: 'xxxName',
}
使用是在页内引入对应方法
import {
filterFunction,
filterOption,
filterLabel,
filterValue,
} from 'src/Utils/filterUtils';
然后使用即可:
<q-select
  dense
  outlined
  rounded
  use-input
  :options="filterOption['xxxList']"
  @filter="filterFunction['xxxList']"
  :option-label="filterLabel['xxxList']"
  :option-value="filterValue['xxxList']"
  emit-value
  map-options
/>
页面拆分
Dialog
每个页面基础弹窗命名包含:
新增: addDialog.vue
编辑: EditDialog.vue
新增或编辑: addOrEditDialog.vue
删除: removeDialog.vue
查看: viewDialog
每个弹窗单独为一个文件 dialog 包含两个基础方法和一个基础变量
visible -> 控制弹窗显示/隐藏的变量
clickForm()—> 控制弹窗显示/隐藏的方法 需提供给父组件
submitForm()—> 提交表单的方法
主页面声明时:
组件名称为引入名称: <addDialog/>
ref名称为组件名删除Dialog: <addDialog ref='add' />
js代码以及方法命名为:

const add = ref();
const addForm = () => {
add.value.clickForm();
};
Nginx部署说明
引言
Nginx 是一个很强大的高性能Web和反向代理服务,也是一种轻量级的Web服务器,可以作为独立的服务器部署网站,应用非常广泛,特别是现在前 端分离的情况下。而在开发过程中,我们常常需要在window系统下使用Nginx作为Web服务器。
下载Nginx
1、去到Nginx官网:http://nginx.org/ ,然后点击“download”
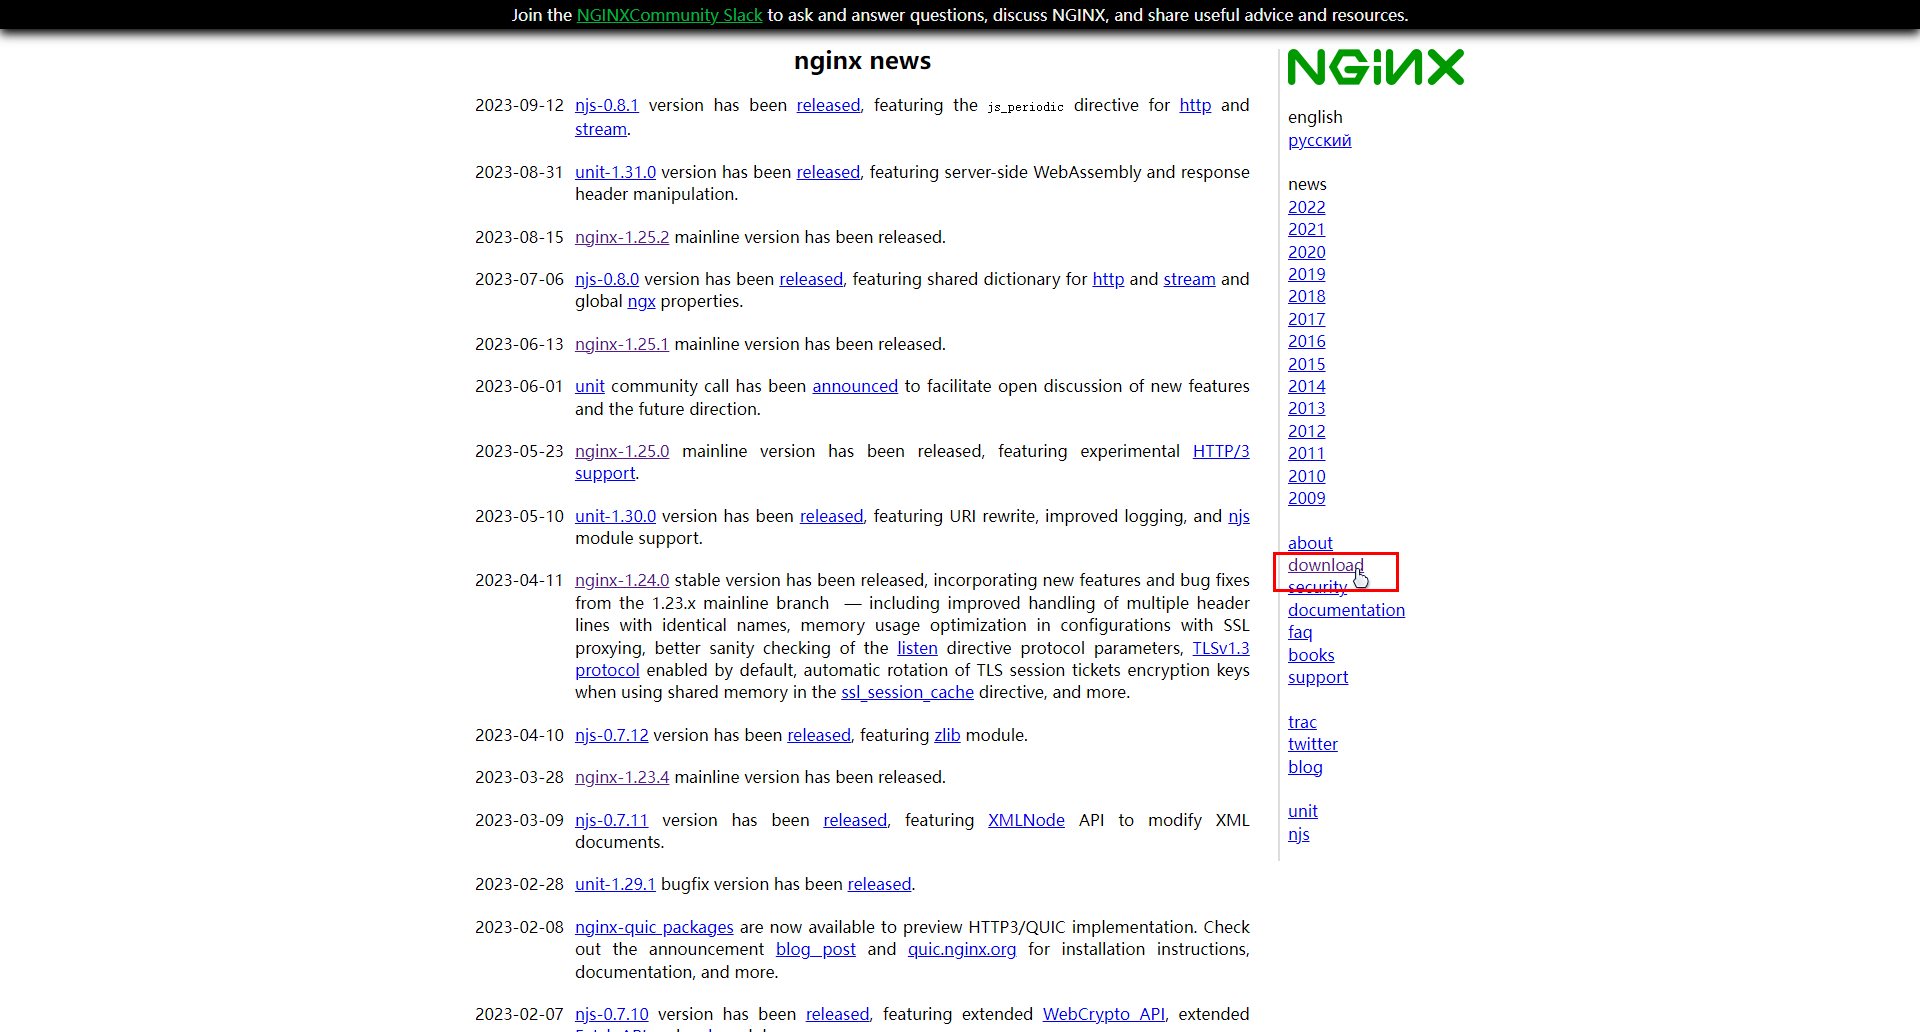
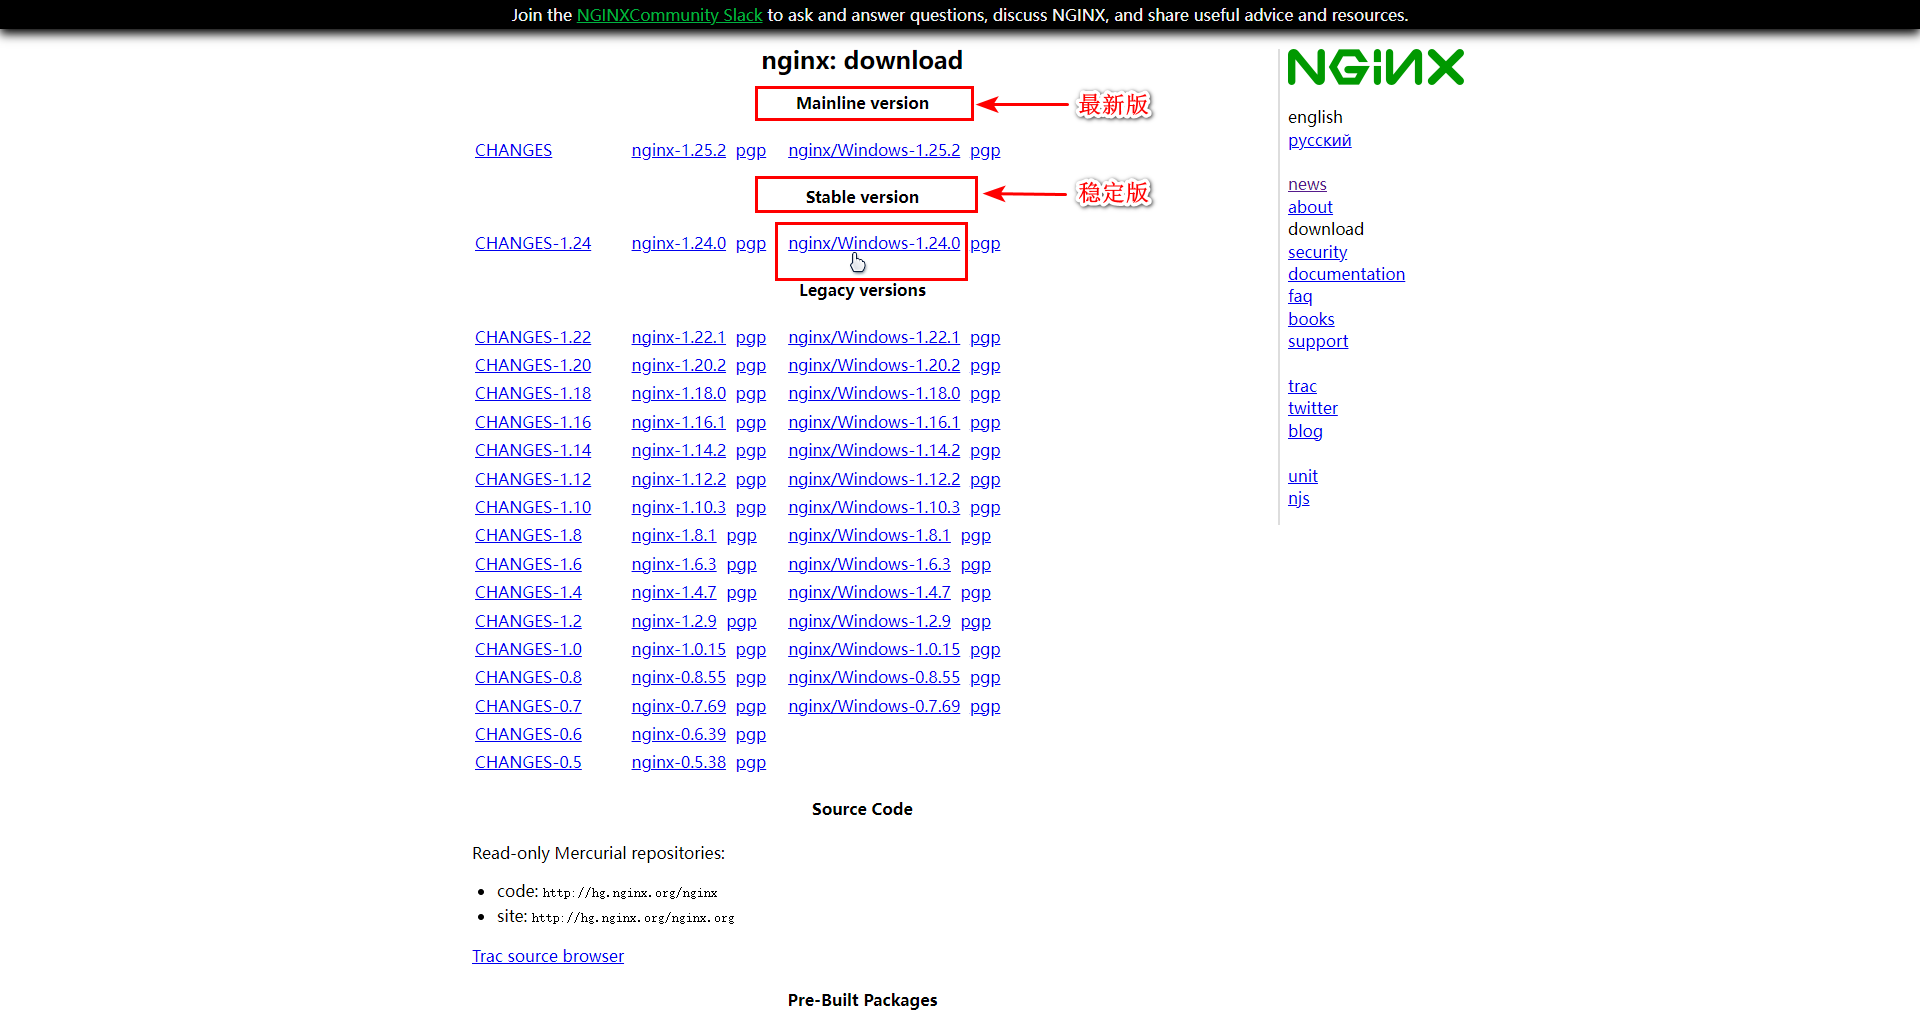
2、在下载界面选择自己想要下载的版本,点击对应版本,下载Nginx。
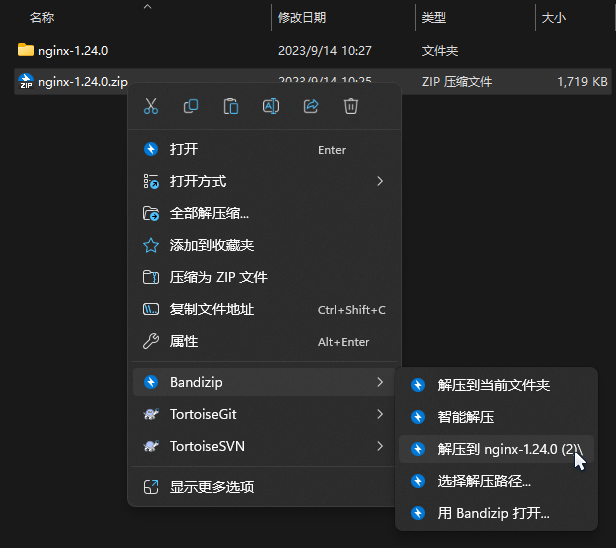
3、 下载完成后,解压Nginx压缩包。
三、Nginx的使用
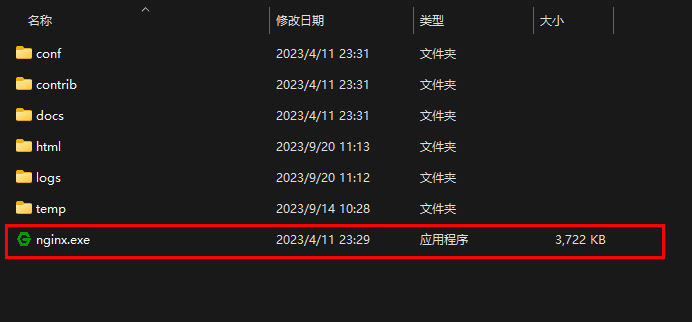
1、打开Nginx文件夹。

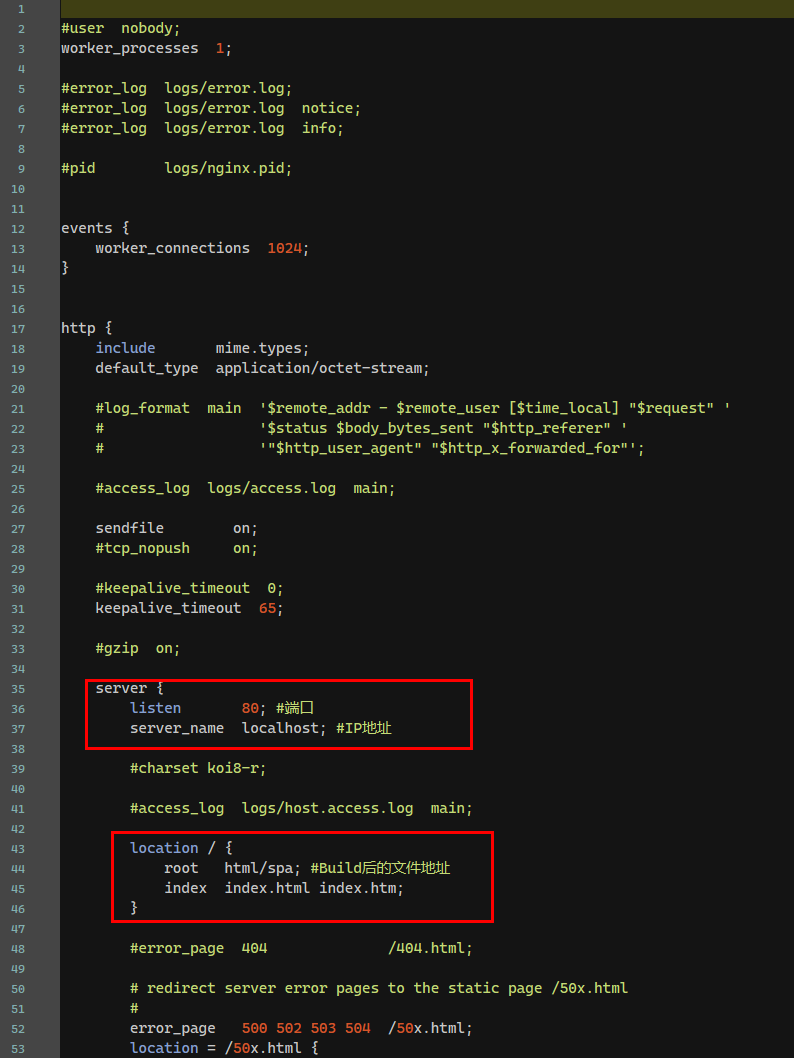
2、在nginx的配置文件是conf目录下的nginx.conf,默认配置的nginx监听的端口为80,如果本地电脑的80端口有被占用,如果本地80端口已经使用则修改成其他端口。
查看80端口是否被占用的命令是:
netstat -ano | findstr 0.0.0.0:80
或
netstat -ano | findstr "80"
3、启动Nginx方法:
方法一:直接双击Nginxm目录下的nginx.exe,双击后一个黑色的弹窗一闪而过就消失了,启动就完成了。
方法二:打开电脑的cmd命令窗口,然后切换到nginx目录下,输入命令 nginx.exe 或者 start nginx ,回车即可完成启动。

4、查看Nginx是否成功的方法
直接在浏览器地址栏输入网址:http://localhost:80 (如果上面修改了其他端口,就将80改成其他端口数),然后点击回车,出现以下页面说明启动成功

5、关闭Nginx 方法一:在cmd命令窗口里面输入nginx命令(快速停止nginx) :
nginx -s stop
或者使用(完整有序的停止nginx)命令:
nginx -s quit
方法二:使用taskkill命令:
taskkill /f /t /im nginx.exe
Nginx开机自启
原理
通过 Windows Service Wrapper 工具,将Nginx转换为Windows服务,Windows系统重启后会自动启动Nginx服务。
实现方法
下载Windows Service Wrapper工具,地址:[https://github.com/winsw/winsw/releases]: Releases · winsw/winsw · GitHub ,根据系统版本下载对应工具。
1.将工具放到Nginx安装目录并命名为nginx-service.exe。
2.在Nginx目录新建服务日志文件夹server-logs文件夹。
3.新建nginx-service.xml文件,写入配置文件。
整体目录如下:
配置文件如下:主要包含日志位置、启动和关闭,目录根据自己安装位置调整(不要有中文)。
<!-- nginx-service.xml -->
<service>
	<id>nginx</id>
	<name>nginx</name>
	<description>nginx</description>
	<logpath>E:\nginx-1.25.1\server-logs\</logpath>
	<logmode>roll</logmode>
	<depend></depend>
	<executable>E:\nginx-1.25.1\nginx.exe</executable>
	<stopexecutable>E:\nginx-1.25.1\nginx.exe -s stop</stopexecutable>
</service>
- 将nginx加载到Windows服务中。在nginx安装目录以管理员身份启用CMD输入:
.\nginx-service.exe install
- 在Windows服务中找到nginx服务,将启动方式改成自动并将其启动。
Windows Service Wtapper 命令
| 命令 | 功能 |
|---|---|
| nginx-service.exe install | 注册系统服务 |
| nginx-service.exe uninstall | 删除已注册系统服务 |
| nginx-service.exe stop | 关闭服务 |
| nginx-service.exe start | 启动服务 |